To eliminate pantry moths, remove infested items, scrub and vacuum shelves, seal gaps, set pheromone traps, and store foods in airtight containers.
Pantry moths sneak in when we least expect it. One moment you’re grabbing a bag of rice, the next you’re staring at silky webs and wriggling larvae. Yikes! These tiny invaders can turn your favorite snacks into a bug buffet if you let them run wild. But don’t sweat it—nipping this problem in the bud is easier than you might think.
If you’ve ever wondered How To Get Rid Of Moths In Your Pantry?, you’re in the right spot. We’ll walk through every step—from spotting the first signs of trouble to locking your goods up tighter than Fort Knox. Ready to reclaim your shelves? Let’s dive in.
By the end, you’ll have a rock-solid game plan. No more frantic scrubbing or midnight freak-outs. You’ll know exactly what to do, what to avoid, and which products actually work. Plus, you’ll pick up tips to keep these pests at bay for good. Let’s get started!
Understanding Pantry Moths and Their Lifecycle
Pantry moths aren’t one-size-fits-all. Several species love dry goods, and each comes with its own quirks. Learning who you’re up against is step one. That way, you can tailor your attack and avoid wasting time on the wrong tactics.
Identifying Common Species
Most infestations come from the Indian meal moth (Plodia interpunctella), but you might also spot the Mediterranean flour moth or even the warehouse moth. They differ in size, color, and behavior, so knowing the enemy helps you pick the right weapon.
| Species | Appearance | Lifecycle Duration | Favorite Food Sources | Distribution |
|---|---|---|---|---|
| Indian Meal Moth | 8–10 mm wingspan; forewings coppery with grey tips | 30–300 days (temp-dependent) | Grains, cereals, nuts, dried fruit | Worldwide |
| Mediterranean Flour Moth | 10–14 mm wingspan; grey body with pale hindwings | 40–70 days | Flour, meal, pasta, grains | Temperate zones |
| Warehouse Moth | 20–25 mm wingspan; mottled brown and black pattern | 28–35 days | Grains, animal feed, seeds | Global |
| Almond Moth | 12–18 mm wingspan; pale greyish-white with faint spots | 30–60 days | Nuts (almonds), dried fruit | Worldwide |
| Tobacco Moth | 10–16 mm wingspan; narrow grey wings with dark band | 25–45 days | Tobacco, dried herbs, spices | Worldwide |
This table lays out the heavy hitters. The Indian meal moth crops up most often in home kitchens. Mediterranean flour moths love the flour jar, while warehouse moths tend to rear their heads if you buy bulk grains. Spot the culprit, and you’ll know where to dig in next.
Lifecycle Stages and Behavior
Pantry moths crank through four stages: egg, larva, pupa, adult. Eggs are tiny—barely visible to the naked eye. Larvae do the real damage; they chew through packaging and spin silk webbing over your goods. Pupae hide in cracks, waiting to hatch. Adults then flutter around lights, lay more eggs, and the cycle repeats. Depending on temperature, this whole loop can take a month or drag on for almost a year. Cooler pantries slow them down; warmth speeds them up.
Understanding this lifecycle is clutch. You can interrupt it at multiple points—vacuuming up larvae, sealing cracks before pupae slip in, and trapping adults before they breed. Let’s move on to spotting these pests before they take over.
Recognizing an Infestation: Telltale Signs
Pantry moths are sneaky, but they leave clues. You just have to know where to look and what to look for. Ignoring the first hints can lead to a full-blown infestation that’s a major headache.
Visual Clues in Your Pantry
First up: webbing. Silk-like threads over grains or clinging to jar walls scream “moth party in progress.” You might also catch adult moths flitting around cabinet lights, especially at dawn or dusk. Larvae look like tiny white worms with brown heads—gross, but unmistakable once you know. Keep your eyes peeled for irregular holes in boxes or small piles of fine powder (moth poop).
Checking Food Packaging
Inspect every bag and box. Old packaging often hides the worst infestations. Shake cereal boxes over a clean plate—any little specks moving? Toss it. Flour bags with clumps? That’s a no-go. Nuts coated in dusty residue? It’s safer to bin them than risk a reinfestation. Always buy in airtight containers if possible, and examine new purchases before tossing them in.
Staying vigilant here can save you tons of trouble down the road. Nip the problem early, and you’ll skip most of the cleanup drama.
Clearing and Cleaning: The First Line of Defense
Once you spot trouble, it’s time to roll up your sleeves. This section covers the deep clean that’ll zap eggs, larvae, and pupae hiding in every nook.
Clearing and Inspecting Items
Empty the entire pantry. Yep, everything. Lay items out on the counter or table. Sort them into three piles: keep, toss, treat. Anything showing webbing, larvae, or holes goes in “toss.” Bulk goods that look okay but worry you go in “treat.” Untreated items get bagged and frozen for a week—that kills eggs and larvae. Keep safe items in sealed containers while you scrub.
Deep Cleaning Shelves and Storage Areas
Now, scrub time. Pull out shelves or trays if you can. Vacuum the corners, edges, and cracks—don’t leave a speck. Wipe down with warm, soapy water, then finish with a vinegar spray (one part vinegar to one part water). Vinegar is non-toxic and deters moths. Let everything dry completely before restocking.
Vacuuming and Sealing Cracks
Vacuuming is non-negotiable. Use the crevice tool to get into every groove. After vacuuming, seal cracks and gaps with caulk or weatherstripping. Moths can slip through pencil-width spaces. Seal up the pantry perimeter so future invaders can’t sneak in behind your back.
With shelves spotless and gaps sealed, you’ve broken most of the lifecycle. Next, let’s talk traps and natural remedies to catch any stragglers.
Harnessing Traps and Natural Remedies
Chemical sprays can feel heavy-handed in a food zone. Thankfully, you’ve got gentler options that pack a punch.
Pheromone Traps
Pheromone traps lure male moths with scents they can’t resist. They stick to the trap and starve the breeding cycle. Place one trap per shelf, especially near food sources. Change them every six weeks or as the instructions dictate. Brands are cheap and widely available.
You can pick up traps at garden centers or order them online. Make sure to get ones labeled for pantry or Indian meal moths for best results.
DIY Natural Solutions
If store-bought traps aren’t your thing, whip up these natural deterrents:
- Bay Leaves: Toss a few in jars or scattered on shelves. Moths hate the smell.
- Lavender Sachets: Hang small bags in your pantry. Place dried lavender buds in breathable cloth.
- Essential Oils: Mix tea tree or eucalyptus oil with water and spritz shelves.
- Sticky DIY Traps: Spread a thin layer of petroleum jelly on a card, sprinkle flour or sugar on top, and place near infested zones. Moths land, get stuck, and you dispose of them.
Natural solutions can’t replace a deep clean, but they help stop adults from doing an encore performance.
Prevention Strategies for Long-Term Peace of Mind
Once you’ve cleared out the invaders, the goal is to keep them out. Smart storage and regular checks will save you future headaches.
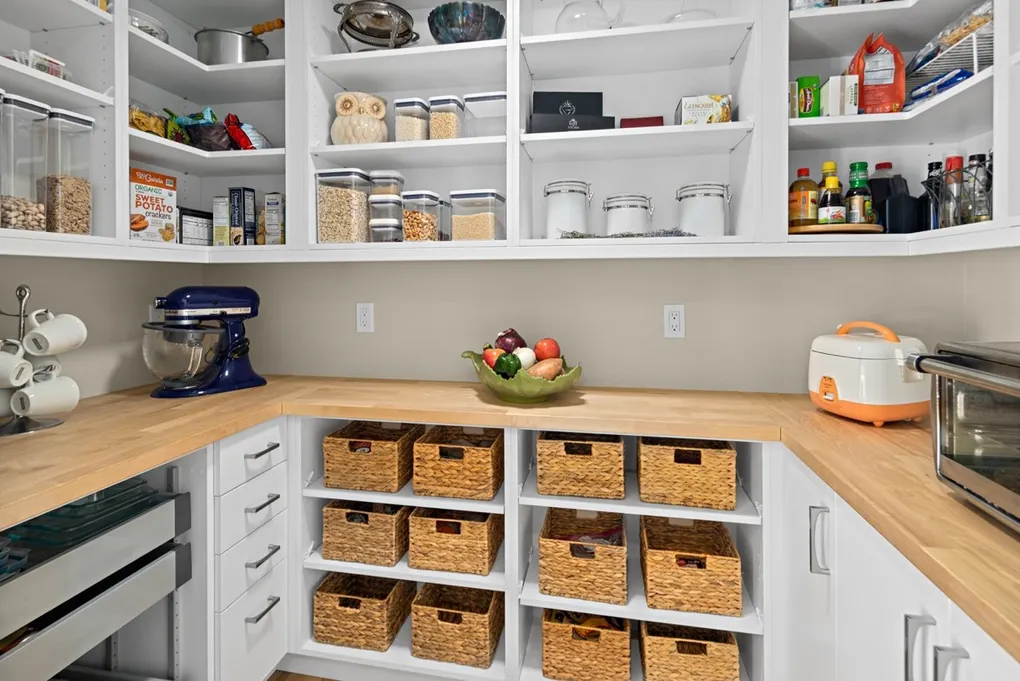
Airtight Storage Techniques
Store all dry goods in airtight containers—glass, hard plastic, or metal. Look for lids with silicone seals or locking clips. Label each container with purchase date. Rotate older items to the front so nothing hangs around past its prime.
Regular Maintenance and Monitoring
Set a calendar reminder to inspect your pantry every month. Look for webbing, odd holes, or dusty residue. Swap out pheromone traps every six weeks. Wipe down shelves with a vinegar spray to keep scents fresh and moths discouraged.
Here’s a quick reference table for container types:
| Container Type | Ideal For | Pros | Cons | Price Range |
|---|---|---|---|---|
| Glass Jars w/ Seals | Grains, Flour, Nuts | Airtight, non-porous, washable | Heavier, breakable | $2–$5 per jar |
| Plastic Containers | Pasta, Cereal | Lightweight, stackable | Can stain, may warp | $1–$3 per container |
| Metal Tins | Sugar, Beans | Durable, insect-proof | Can dent, opaque | $5–$10 per tin |
| Vacuum-Seal Bags | Seasonal Bulk Items | Compresses goods, long-term storage | Requires vacuum machine | $0.50–$1 per bag |
| Silicone Food Pouches | Snacks, Spices | Flexible, resealable | Punctures if sharp items | $3–$7 per pouch |
Using the right containers is like building a fortress around your food. No cracks, no entry.
When to Seek Professional Help
Sometimes DIY methods hit a wall. If moths keep showing up despite your best efforts, it might be time to call in the pros.
Over-the-Counter Products
Look for insect growth regulators (IGRs) labeled safe for kitchens. These prevent larvae from maturing. Always follow label directions, remove food items, and ventilate afterward. Avoid broad-spectrum insecticides around food.
Safe Chemical Options
For stubborn cases, professionals use targeted sprays and dusts that won’t contaminate edibles. They apply treatments in cracks and voids, not directly on pantry shelves. If you hate bugs at any cost, scheduling a one-time service can make sense. Many pest-control companies offer green or low-tox options. Check with your local provider.
If you’re renting, your landlord may cover treatment costs. Don’t hesitate to reach out—no shame in getting expert backup.
Eco-Friendly and Sustainable Control Tips
You don’t have to wage chemical warfare. Plenty of green methods keep moths at bay without harming the planet.
Non-Toxic Methods
Besides bay leaves and lavender, consider cedar blocks. Cedar shocks off a scent moths detest. Replace them every few months to keep the aroma strong. You can also freeze grains for 72 hours before storage to kill any hitchhikers.
Keeping Pantry Dry and Cool
Moths love warmth and humidity. Install a small dehumidifier or keep a moisture absorber on a low shelf. Aim for below 65% humidity. Keep pantry doors closed tight to maintain a stable environment. A cool, dry space is less inviting for egg-laying.
Combine these habits with airtight storage, and you’ll make your pantry as unwelcoming as a winter tundra for moths.
Staying Vigilant: Seasonal Patterns and Ongoing Monitoring
Pantry moths don’t follow a calendar, but they do respond to temperature and food availability. Summer brings faster lifecycles, while winter slows them down—unless your pantry doubles as a sauna.
Seasonal Inspection Schedule
- Spring: Do a full clean and seal gaps. Temperatures rise; eggs hatch faster.
- Summer: Increase checks to twice a month. Change pheromone traps more often.
- Fall: Inspect after bulk harvest purchases (think grains, nuts).
- Winter: Monthly checks suffice if you’ve nailed storage. Watch for warmth near appliances.
Ongoing Monitoring Tools
Set sticky notes or phone reminders to inspect. Use small transparent jars with bait as early-warning traps. If you catch even one in a trap, spring into action—clean, vacuum, reseal. A proactive approach stops small problems from snowballing into full-blown infestations.
Stay on your toes, and your pantry will stay moth-free year-round.
Key Takeaways: How To Get Rid Of Moths In Your Pantry
➤ Identify Infestation Signs: Look for webbing, larvae, and adult moths.
➤ Deep Clean Regularly: Empty your pantry, scrub shelves, and vacuum cracks.
➤ Airtight Storage is Key: Use sealed containers to protect dry goods from pests.
➤ Pheromone Traps Work: Place traps to catch male moths and disrupt breeding.
➤ Monthly Inspections Matter: Regular checks help catch problems before they escalate.
➤ Monthly Inspections Matter: Regular checks help catch problems before they escalate.
Frequently Asked Questions: How To Get Rid Of Moths In Your Pantry
What are the main types of moths that infest pantries?
The most common pantry moth is the Indian meal moth, but others include the Mediterranean flour moth and warehouse moth. Each species has unique preferences for food sources and habitats, which can influence your approach to pest control.
How can I prevent pantry moths from entering my home?
To prevent pantry moths, ensure all food items are sealed in airtight containers. Regularly inspect new groceries before storing them. Keeping your pantry clean and dry also reduces the likelihood of attracting these pests.
Are there any natural remedies for getting rid of pantry moths?
Yes, natural remedies include using bay leaves or lavender sachets. These scents deter moths. Additionally, you can create sticky traps using petroleum jelly mixed with flour or sugar to catch adult moths.
How often should I check my pantry for signs of moths?
You should inspect your pantry at least once a month. Pay attention to any signs such as webbing, larvae, or unusual holes in packaging. Regular checks help catch infestations early before they escalate.
When is it necessary to call a professional for pest control?
If DIY methods fail to eliminate the infestation or if you notice a reoccurrence despite your efforts, it may be time to call a professional. They can provide targeted treatments that are safe for food areas and more effective against stubborn infestations.
Wrapping It Up – How To Get Rid Of Moths In Your Pantry?
You’ve got the lowdown. From identifying species to sealing every crack, you can take back control. Remember to clear out infested goods, deep clean with vinegar, deploy traps, and switch to airtight containers. Check regularly and adapt your efforts by season. With these tactics, pantry invaders don’t stand a chance.
Keep your pantry fresh, your snacks safe, and your mind at ease. Wave goodbye to moth drama, and say hello to peace of mind. Ready to put your Pantry Protection Plan into action? Go for it—no more uninvited winged guests here!
For more tips on managing kitchen pests, check out the University of Kentucky Extension and the National Pesticide Information Center.